 Loam & Leaf
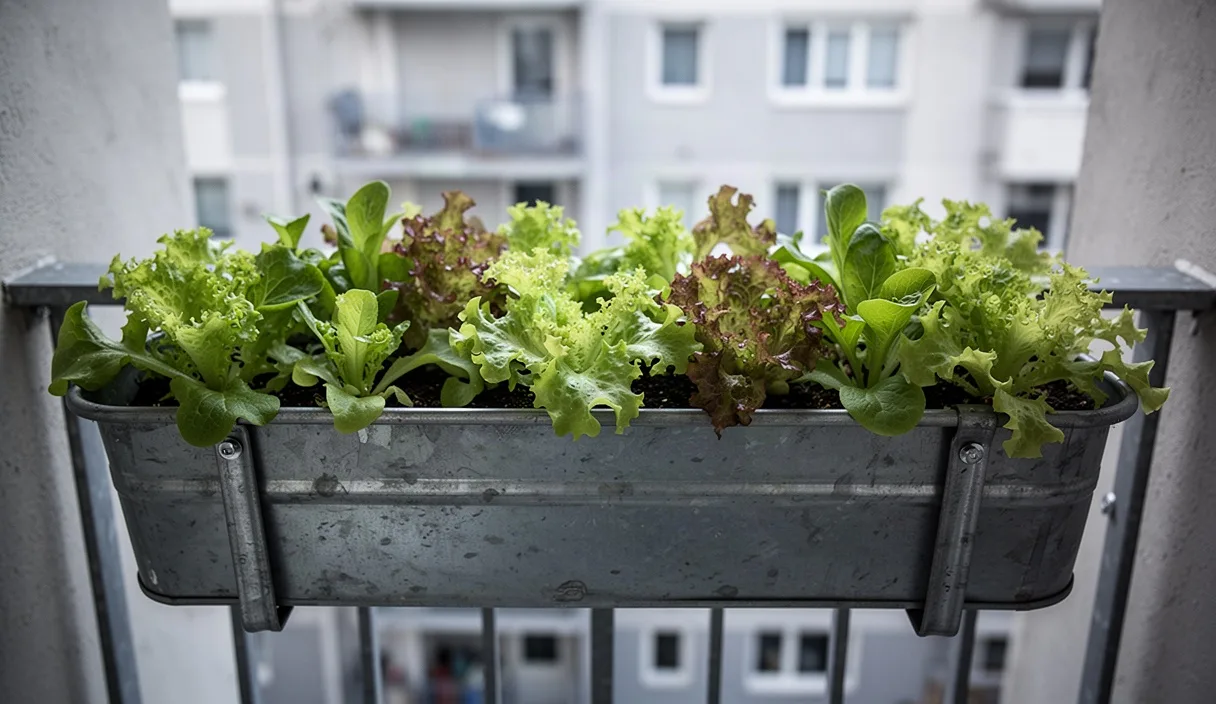
Harvest fresh salad leaves multiple times from a compact balcony container. Sow dense seeds and harvest above the basal crown.

- Shallow containers suit fibrous lettuce roots.
- Harvesting outer leaves sustains ongoing growth.
- Consistent moisture prevents bitter leaves.
Salad greens grow quickly in shallow soil. A trough sits well on a stone ledge or a narrow balcony floor. You sow the seeds close together. You trim the leaves while they are young. New leaves emerge from the base within days.
This method suits small spaces and short routines. It bypasses the need for heading lettuces or heavy yard plots. You harvest what you need for an evening meal. The root systems stay undisturbed in the compost.
Selecting container depth and drainage
A trough needs a depth of at least fifteen centimeters. Most salad greens produce fibrous roots that spread sideways rather than deep into the ground. A depth of eighteen centimeters gives a buffer against sudden drying out. Deeper troughs hold moisture longer, but they also require more potting mix to fill.
Drainage holes must sit along the bottom base. Drill holes every ten centimeters if the plastic trough lacks them. For terracotta or stone troughs, verify that water runs freely through the base ports. Standing water suffocates young root hairs within forty-eight hours.
Choose materials that balance weight and water retention. Terracotta dries out rapidly in wind. Plastic retains moisture, but it warms quickly in strong sunlight. Wood insulates the root system well against temperature swings.
| Material | Wall Thickness | Weight When Wet | Thermal Stability |
|---|---|---|---|
| Cedar or larch | 20 mm | Moderate | High |
| Unglazed terracotta | 15 mm | Heavy | Moderate |
| Recycled polypropylene | 3 mm | Light | Low |
| Galvanized zinc | 1 mm | Moderate | Low |
Place a layer of mesh over the drainage holes. The mesh stops the compost from washing onto the floor below. Do not use a layer of gravel at the bottom. Gravel reduces the usable root space and forces moisture higher up in the soil column.
Broadcasting seed across soil surfaces
Broadcasting means scattering seeds evenly across the entire soil area. You do not sow in neat rows for cut-and-come-again harvesting. The goal is a dense carpet of green growth. This carpet shades the soil surface and slows moisture loss.
Fill the trough with peat-free compost to within two centimeters of the rim. Firm the compost lightly with a flat wooden block. An uneven surface causes tiny seeds to fall into deep pockets where they struggle to break through. Water the compost thoroughly before you scatter the seed.
Mix very small seeds with dry horticultural sand in a small cup. A ratio of one part seed to three parts sand helps you see the distribution. Scatter the mix across the surface by tapping your wrist. Aim for a spacing of roughly twelve to fifteen millimeters between seeds.
- Oakleaf lettuce: Scatter at twelve seeds per ten square centimeters.
- Wild rocket: Scatter at fifteen seeds per ten square centimeters.
- Mizuna and mibuna: Scatter at eight seeds per ten square centimeters.
- Red Russian kale: Scatter at six seeds per ten square centimeters.
- Bull's Blood beet leaves: Scatter at six seed clusters per ten square centimeters.
Cover the seeds with a fine dusting of sieved compost or vermiculite. A depth of three millimeters is enough for lettuce and brassica greens. Seeds like lettuce require light triggers to break dormancy. Press the surface flat again to bring the seeds into direct contact with the damp earth.
Maintaining surface soil dampness
Germinating seeds must not dry out. A dry period of three hours can kill an emerging radicle. At the same time, pouring water from a can dislodges the seeds and washes them into clumps. Use a hand mister or a copper spray rose with very fine holes during the first ten days.
Check the surface twice daily. In morning light, touch the soil with your fingertip. If the surface feels dry, apply a gentle spray until the top layer turns dark. Avoid soaking the trough until water pours out of the base holes during this early phase.
A sheet of clean burlap or horticultural fleece laid over the trough reduces evaporation. Inspect the soil beneath the cover every morning. Remove the covering the moment the first green shoots appear. Leaving the cover on too long leads to weak, elongated stems that collapse under their own weight.
Once seedlings show their first true leaves, switch to gentle bottom-watering or water around the edges. Keep the foliage dry during late afternoon hours. Wet leaves sitting in cool night air encourage fungal rot and damping-off disease.
Cutting above the central growth point
Salad greens are ready for their first harvest when leaves reach eight to ten centimeters in height. This stage usually occurs three to four weeks after sowing in moderate weather. Harvesting leaves while they are young ensures a tender texture and mild flavor.
Locate the crown of each seedling. The crown is the central base where new leaves form. It sits roughly two centimeters above the compost surface. You must cut above this growing point to allow the plant to regenerate.
Use clean, sharp shears or harvest snips. Dull blades crush the vascular tissues of the stem. Crushed stems turn brown, heal slowly, and invite pests.
- Gather a small handful of leaves loosely with your non-dominant hand.
- Hold the scissors horizontally, parallel to the soil bed.
- Cut cleanly through the outer leaf stalks two to three centimeters above the soil.
- Leave the smallest, innermost leaves standing intact around the central bud.
- Rinse the harvested leaves immediately in cold water to remove any loose compost.
A single sowing provides three to four successive cuts under good conditions. Each cut yields slightly coarser leaves than the previous one. After the third cut, the plants often produce bitter milky sap or begin to bolt.
Succession sowing every three weeks
Cut-and-come-again beds exhaust their vigor over time. Leaves from an aging plant grow tougher and take on sharp, bitter tones. A steady supply requires staggered sowing dates across multiple containers.
Use a rotation of three separate troughs. Sow the first trough at the start of the month. Sow the second trough twenty-one days later. Sow the third trough twenty-one days after the second.
| Container | Day 1 | Day 21 | Day 42 | Day 63 |
|---|---|---|---|---|
| Trough A | Sow seed | First cut | Third cut; compost old roots | Sow seed |
| Trough B | Resting | Sow seed | First cut | Third cut; compost old roots |
| Trough C | Resting | Resting | Sow seed | First cut |
When a trough finishes its final harvest, clear out the root system. Shake the loose soil back into a bucket. Compost the old roots and leaf scraps. Do not reuse depleted potting mix without mixing in fresh compost.
Blend the used soil with thirty percent mature, well-sifted worm castings or fresh potting soil. This restores air space and provides basic nutrition for the next round of seeds. Greens need mild nitrogen levels, but excess fertilizer causes rapid, weak growth that attracts aphids.
Controlling heat stress on balconies
Balcony microclimates pose distinct challenges for leafy greens. Dark walls, concrete pavers, and metal railings absorb solar heat throughout the day. They re-radiate this heat long after the sun moves away. Lettuce begins to bolt when ambient root temperatures pass twenty-three degrees Celsius.
Bolting changes the plant architecture. The stem elongates, leaves narrow, and white sap fills the stems. This sap tastes strongly bitter. Once bolting starts, the plant cannot return to producing mild salad leaves.
Elevate troughs on wooden battens or clay pot feet. An air gap of two centimeters between the container base and concrete flooring cuts down thermal transfer. The air moving underneath keeps the root zone cooler during mid-afternoon peaks.
Use light-colored containers to reflect solar radiation. If you have dark plastic troughs, wrap them in light linen or place them behind a slatted timber screen. Provide shade between midday and three in the afternoon using thirty percent shade cloth or the natural shadow of taller potted plants like beans or tomatoes.
Selecting heat-tolerant varieties
Some greens tolerate elevated temperatures better than classic butterheads. Choose varieties bred to resist premature bolting during warmer weeks.
- Salad Bowl green and red: Loose-leaf types with strong heat tolerance.
- Jericho lettuce: A romaine type selected for hot urban conditions.
- Tatsoi: A compact brassica that stands well in warm weather before bolting.
- Purslane: A succulent green that thrives in bright heat and dry air.
Common mistakes
A frequent error is sowing seeds too deep. Small seeds carry minimal stored energy. A seed buried under twelve millimeters of damp soil exhausts its reserves before its green shoots reach the sunlight.
Overcrowding leads to poor air circulation. When seeds are broadcast too thickly, hundreds of seedlings compete for every centimeter of space. Weak stems fall over, and botrytis fungus quickly rots the base of the crop.
Cutting too low removes the growth crown entirely. If you sever the plant at soil level, it cannot put out secondary shoots. The plant dies, and the roots rot in the container.
Relying on old potting soil without refreshing it starves the second and third crops. Fast-growing greens deplete available nitrogen quickly in shallow troughs. Yellowing lower leaves usually indicate a lack of nitrogen or poor drainage.
Practical next steps
Assess your growing location. Measure the rail or floor space where your containers will sit. Note how many hours of direct sunlight hit that exact surface every day. Four to five hours of gentle morning sun is plenty for most cut greens.
Acquire two or three identical troughs with matching trays. Gather peat-free compost, sharp kitchen scissors, and fresh seed packets. Label each trough with the sowing date using waterproof markers.
Sow your first batch of seed this week. Water it in gently with a fine mist. Mark your calendar for twenty-one days from now to prepare the second trough. If your balcony structural weight limits are uncertain, consult a structural engineer before loading stone planters with wet compost.
This journal provides educational content only; consult your regional agricultural extension office for local planting dates and soil pathology. Disclaimer