 Loam & Leaf
Learn how water moves through your garden beds before planting. Dig a test hole to identify hardpan layers and standing water.
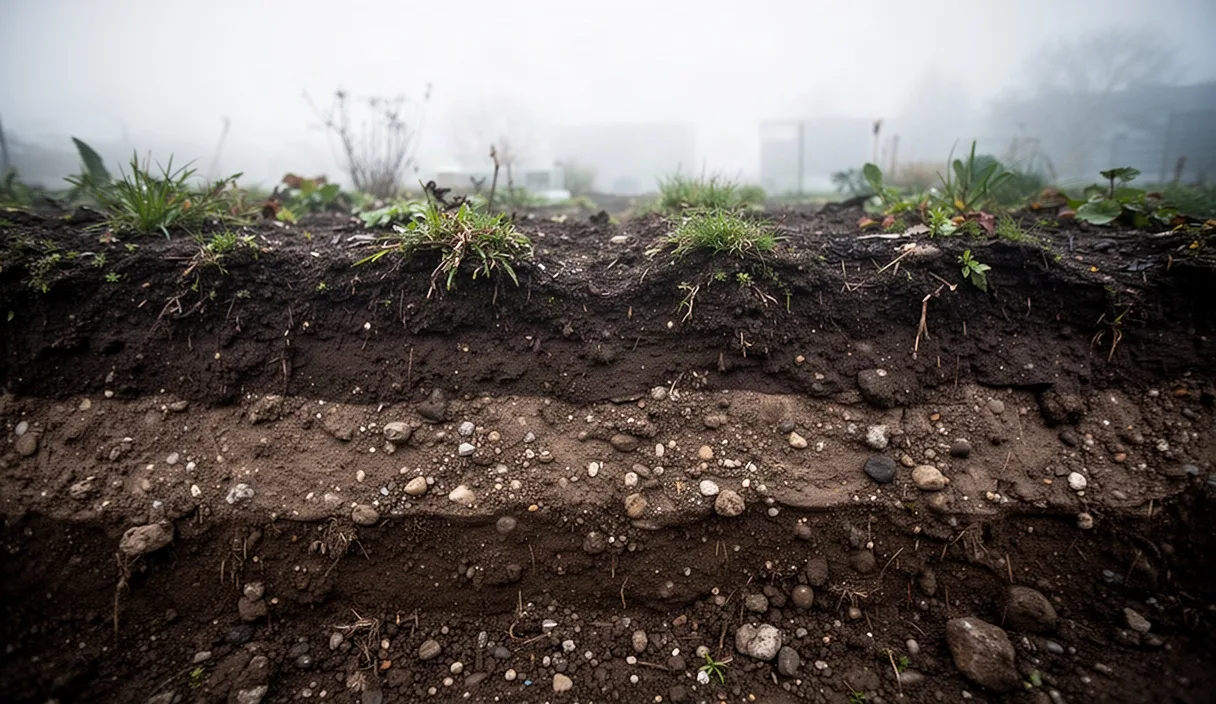

- A twelve-inch test hole shows water absorption speed.
- Sandy loam drains faster than compacted subsoil.
- Proper drainage protects roots from rot.
Water moves through soil under the pull of gravity and capillary forces. The speed of this movement determines whether plant roots receive adequate oxygen or suffocate in standing water. A percolation test reveals this rate with simple tools and direct observation.
You need a shovel, a ruler, water, and time. Testing the soil before planting prevents root rot in damp ground and water stress in porous sand. The following steps show how to prepare the site, record the drop, and read the results.
Digging the percolation pit
Choose a location that represents your intended planting area. Avoid spots directly under roof downspouts or near outdoor water spigots. Clear surface mulch, leaves, and weeds from the soil surface.
Dig a hole with straight, vertical sides. Make the hole 12 inches deep and 12 inches wide. A uniform cylinder shape produces more accurate readings than an angled bowl shape.
Digging tools often smear the sides of the hole in fine-textured soils. Use a hand fork or trowel to scrape the smeared interior walls lightly. This restores the natural pore openings in the earth.
Clear all loose soil crumbs out of the bottom of the pit. Place 1 inch of coarse gravel or sharp grit across the base. The stone layer prevents muddy churning when you pour water into the pit.
- Shovel or post-hole digger for excavation
- Hand trowel for scraping smeared sidewalls
- Tape measure or rigid wooden ruler
- Coarse horticultural grit or pea gravel
Measuring the initial water fill
Dry soil absorbs water faster than wet soil. You must saturate the surrounding ground before taking official measurements. This pre-soak accounts for the natural moisture capacity of the subsoil.
Fill the pit to the top with clean water. Let this water drain away completely. For dry clay soils, this initial absorption can take several hours.
If the hole empties in less than 30 minutes, fill it a second time. Let that second filling drain down as well. Sandy soils require this repeated fill to moisten the perimeter fully.
If water remains in the hole after 12 hours, stop the test. Note the remaining level on your pad. This indicates saturated subsoil or an impermeable hardpan beneath the surface.
Timing water drop rates
Begin the timed test immediately after the pre-soak water drains away. Lay a flat board or straight stake across the opening of the hole. This board provides a fixed reference point for all measurements.
Fill the hole with water to a depth of 6 inches. Push your ruler vertically into the gravel base until it touches the firm soil floor. Align the top of your ruler against the reference board.
Record the starting water level and the exact minute on your clock. Check the depth every 60 minutes for four consecutive hours. Record each reading on paper in a simple column.
| Elapsed Time | Water Level | Hourly Drop |
|---|---|---|
| Start (0 minutes) | 6.0 inches | 0.0 inches |
| 60 minutes | 4.5 inches | 1.5 inches |
| 120 minutes | 3.0 inches | 1.5 inches |
| 180 minutes | 1.5 inches | 1.5 inches |
| 240 minutes | 0.0 inches | 1.5 inches |
Fast-draining sand drops rapidly. Check sand every 15 minutes instead of every 60 minutes. Multiply the 15-minute drop by 4 to calculate the hourly rate.
Slow soils require patience. If the drop is less than half an inch per hour, extend the test period to 8 hours. Measure the drop twice per day if the movement is barely visible.
Interpreting soil drain times
Divide the total drop in inches by the number of elapsed hours. This calculation gives you the drainage rate in inches per hour. Most common garden plants prefer a rate between 1 inch and 3 inches per hour.
A drop rate greater than 4 inches per hour indicates sandy, low-nutrient ground. Water leaves this root zone too quickly for sustained absorption. Plants in this soil often show drought stress even during regular watering cycles.
A drop rate below 1 inch per hour indicates heavy clay or compacted silt. Water displaces oxygen from the pores around the roots. Anaerobic bacteria multiply in these conditions, leading to root death and stem rot.
| Drop Rate per Hour | Drainage Classification | Plant Suitability |
|---|---|---|
| Under 1 inch | Poor drainage | Bog plants, river birch, willow, moisture-tolerant sedges |
| 1 to 3 inches | Ideal drainage | Most vegetables, perennials, shrubs, fruit trees |
| Over 4 inches | Excessive drainage | Mediterranean herbs, drought-hardy grasses, succulents |
If water sits unchanged for 24 hours, you have an impermeable layer. A high local water table or dense construction subsoil may cause this condition. Deep-rooting taproot crops will struggle without site remediation.
Amending dense clay with organic matter
Dense clay consists of microscopic, plate-shaped mineral particles. These plates lie flat against one another and restrict water flow. You cannot change the mineral texture, but you can build granular structure.
Incorporate well-decomposed compost into the native earth. Microorganisms digest this organic matter and excrete biological glues. These substances bind fine clay plates into rounded clumps, creating stable air pores between them.
Spread a layer of compost 2 inches deep over the planting bed. Work this material into the top 6 inches of soil with a spade or broadfork. Do not pulverize wet clay with an engine-powered rotary tiller, as tilling destroys structural aggregates.
- Finished compost made from decomposed leaves and yard trimmings
- Aged bark fines, sized below one-quarter inch
- Mushroom compost low in residual soluble salts
- Cover crops such as winter rye or daikon radish to open taproot channels
Avoid adding builder sand directly to clay soil. Adding coarse sand to fine clay without massive quantities creates a dense, cement-like mixture. Organic matter remains the safe, predictable amendment for tight ground.
Topdress beds with a 2-inch layer of wood chips or shredded leaf mulch every autumn. Earthworms pull this surface material down into their subsoil tunnels. This biological process creates drainage channels naturally over multiple seasons.
Choosing between raised beds and in-ground beds
Your percolation number dictates your bed design. Modifying native ground takes time and repeated inputs of compost. Raised beds provide an immediate alternative when in-ground drainage fails the baseline test.
Construct raised beds if your percolation pit drops less than 1 inch per hour. Build the frame at least 10 inches tall. Fill the structure with a balanced mix of topsoil, clean mineral grit, and stable organic matter.
Keep your plantings in the ground if your test shows a drop between 1 inch and 3 inches per hour. In-ground beds require less frequent watering during dry spells. Deep root systems stay cooler in native soil during peak summer temperatures.
| Factor | In-Ground Planting | Raised Bed Planting |
|---|---|---|
| Drainage control | Dependent on native subsoil | Fully controlled soil blend |
| Initial labor and material | Lower setup requirements | Lumber, fasteners, bulk soil mix |
| Irrigation frequency | Less frequent watering needed | Frequent watering required |
| Root temperature | Insulated by surrounding ground | Fluctuates with air temperature |
| Best percolation rate | 1 to 3 inches per hour | Under 1 inch per hour |
Consider the long-term maintenance of wooden frames. Untreated pine boards decay in contact with damp earth within four years. Cedar, black locust, or stone borders provide longer service lives in wet garden plots.
Common mistakes
Skipping the pre-soak step creates misleading results. Dry clay absorbs an initial burst of water through surface cracking, then slows to a crawl once wet. Always saturate the pit and let it empty before you start timing.
Digging a bowl with sloping walls alters the volume-to-depth ratio. A conical hole drops water unevenly as the water surface contracts. Keep your side walls perpendicular to the bottom edge.
Testing right after a multi-day storm distorts normal performance. A temporary perched water table can show a false zero rate. Wait 3 days after heavy rainfall before digging your test pit.
Pouring water vigorously into an unprotected hole erodes the walls. Suspended silt settles at the base and forms a waterproof mud seal. Always pour water gently over your gravel base layer.
Next steps
Select your planting area and mark the pit perimeter. Dig your 12-inch test cylinder on a dry morning when the soil is workable. Gather your ruler, a flat board, and a notebook before you begin.
If your soil drains between 1 inch and 3 inches per hour, proceed with direct planting. Add a light 1-inch layer of compost to maintain the existing crumb structure. Choose plants suited to your regional sun and hardiness zone.
If your pit holds standing water for more than 24 hours, examine the broader topography. Look for low spots, hardpan layers, or poor surface grading near building foundations. If standing water threatens a home structure or septic field, consult a civil drainage engineer or a certified hydrologist before undertaking major earthworks.
This journal provides educational content only; consult your regional agricultural extension office for local planting dates and soil pathology. Disclaimer